Safely Removing a Wasp Nest: Expert Tips and Guidelines
Wasp nest removal is a task that should be approached with caution and knowledge. In our article, we’ll delve into the intricacies of safely removing a wasp nest, addressing the critical factors that can help you navigate this potentially hazardous situation. We’ll provide guidance on handling health risks, including wasp stings and allergies, as well as appropriate first aid measures and when to seek medical attention. Our aim is to equip you with comprehensive knowledge to ensure the safe and effective removal of wasp nests while minimizing risks to both you and the environment.
Identifying and Assessing the Wasp Nest
How to Recognize a Wasp Nest
Recognizing a wasp nest is the first step in safely dealing with it. Wasp nests can vary in appearance depending on the species and location. Here are some key pointers to help you identify them:
Sight
Wasp nests are typically papery or waxy and can come in various shapes and sizes. They may resemble a small, hanging paper lantern, an umbrella, or even a mud-like structure, depending on the species. Look for these distinctive shapes in the areas where you suspect a nest.
Location
Wasp nests are commonly found in sheltered spots, such as eaves, trees, shrubs, wall voids, and underground burrows. They can also be located in unexpected places like attic spaces, garages, or even inside wall voids. Be attentive to these locations, especially during the warm months when wasps are active.
Not the pest you are looking for?
Check out our pest library to see what other pests we have articles on
Nest Activity
Watch for signs of wasp activity around the nest. Wasps will frequently enter and exit their nests. If you notice a steady stream of wasps coming and going from a specific area, it’s a strong indication of a nest’s presence.
Papery Texture
Most wasp nests have a papery appearance, made from chewed wood fibers mixed with saliva. If you spot a structure resembling layered paper, exercise caution.
The Different Types of Wasp Nests
Not all wasp nests are created equal. Understanding the type of nest you’re dealing with is crucial because it impacts the removal process and potential risks. Here are some common types of wasp nests:
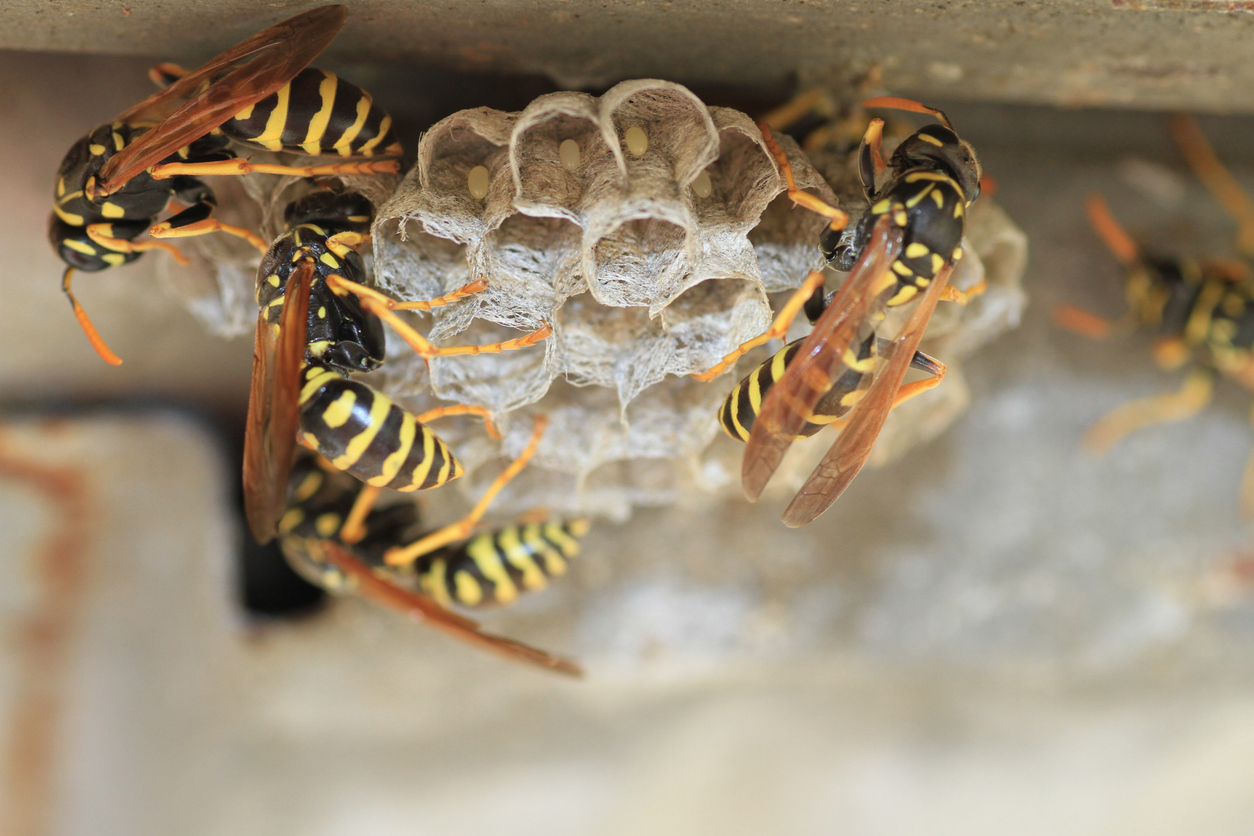
- Paper Wasp Nests – Paper wasps construct open, umbrella-shaped nests. They attach these nests to a surface using a single stalk. These nests are usually small and can often be seen under eaves, in bushes, or on tree branches.
- Yellowjacket Nests – Yellowjackets create nests in various locations, including the ground, wall voids, and attics. Their nests are enclosed, resembling a spherical or oblong ball with a small entrance hole.
- Hornet Nests – Hornets build large, enclosed nests, often in trees or high up in structures. These nests are typically grayish and can grow to be quite substantial. Hornet nests can be especially dangerous due to their size and the aggression of hornets.
The Significance of Identifying Wasp Species
Identifying the species of wasp inhabiting a nest is vital for several reasons:
- Safety Precautions – Different wasp species have varying levels of aggression. Knowing the species will help you gauge the potential threat and take appropriate safety measures.
- Treatment Approach – The choice of insecticides or deterrents may vary depending on the wasp species. Some species may require specific treatments for effective removal.
- Environmental Impact – Certain wasp species are beneficial pollinators, and preserving them is essential. Identifying the species allows you to make informed decisions about removal or relocation.
To identify the wasp species, observe their physical characteristics, such as size, color, and markings. You can also consult local resources or entomologists for expert assistance. Remember that when dealing with wasp nests, safety should always be your top priority.
Safety Precautions Before Removal
When it comes to removing a wasp nest, your safety should be paramount. Here’s why safety gear is crucial:
- Protection from Stings – Wasps can become highly aggressive when their nest is threatened. Wearing protective gear, such as a beekeeping suit or coveralls, gloves, and a beekeeper’s veil, shields you from painful stings.
- Preventing Allergic Reactions – For individuals with allergies to wasp stings, proper gear is a lifesaver. Anaphylactic reactions can be fatal, so it’s essential to take every precaution.
- Minimizing Exposure – Wearing the right gear ensures that wasps cannot make direct contact with your skin, reducing the chances of stings even if the wasps become agitated during the removal process.
- Eye Protection – Don’t forget safety goggles or a face shield. This protects your eyes from stings and any potential debris during nest removal.
Remember that wasps can sting multiple times, and some species are more aggressive than others. Therefore, investing in and wearing appropriate safety gear is non-negotiable.
Ideal Time for Wasp Nest Removal
Timing plays a significant role in safe nest removal:
- Early Morning or Late Evening – The best time to remove a wasp nest is during the early morning or late evening. At these times, wasps are less active and more likely to be inside the nest. This reduces the risk of stings during removal.
- Warm Weather – Wait for a warm, sunny day to attempt removal. Cold or rainy weather can make wasps sluggish and less likely to leave the nest, but it also makes them more unpredictable and potentially aggressive.
- Avoid Windy Days – Strong winds can make nest removal more challenging and dangerous. Wasps may be agitated by the wind, making them more likely to sting.
Legal Considerations and Permits
Before you embark on wasp nest removal, it’s essential to be aware of any legal considerations or permits required in your area:
- Local Regulations – Some regions may have specific regulations regarding the removal of certain wasp species or nests. Contact your local pest control authority or wildlife agency to understand the rules and requirements.
- Protected Species – In some cases, the wasp species inhabiting the nest may be protected due to their role in pollination or ecological balance. Be sure to confirm whether you’re dealing with a protected species.
- Permits – Depending on your location and the type of wasp nest, you might need permits to remove or relocate them legally. Failure to comply with these regulations could result in fines or legal consequences.
Always check with your local authorities or consult pest control professionals who are well-versed in the regulations of your area. Staying within the bounds of the law ensures that your nest removal is not only safe but also legal.
DIY vs. Professional Removal
Pros and Cons of DIY Removal
When it comes to removing a wasp nest, you have the option to tackle it yourself, but it’s essential to consider the pros and cons:
Pros
- Cost Savings – DIY removal is usually more budget-friendly as you won’t incur professional service fees.
- Immediate Action – You can address the issue promptly without waiting for a professional appointment.
- Learning Experience – It can be an educational opportunity, allowing you to understand the behavior of wasps and gain confidence in dealing with them.
Cons
- Safety Risks – DIY removal carries inherent risks, including the potential for stings, which can be painful and, in some cases, dangerous.
- Ineffectiveness – Without proper knowledge and equipment, DIY attempts may fail, leading to incomplete nest removal and ongoing infestations.
- Damage – Unsuccessful DIY removal attempts can lead to structural damage, especially if nests are located in walls or other sensitive areas.
When to Hire a Professional Exterminator
While DIY removal is an option, there are scenarios where it’s wiser to hire a professional exterminator:
- Large or Aggressive Nests – If the nest is exceptionally large or contains aggressive species like hornets, it’s safer to leave it to the experts. Professional exterminators have the experience and equipment to handle such situations.
- Indoor Nests – Dealing with wasp nests indoors can be tricky and hazardous due to the confined space. Professionals are skilled in indoor nest removal, reducing the risk of accidents.
- Allergies – If you, anyone in your household, or nearby individuals have known allergies to wasp stings, it’s highly advisable to hire professionals. Allergic reactions can be life-threatening.
- Lack of Experience – If you lack experience in wasp nest removal or are unsure about the species, it’s better to err on the side of caution and consult a professional.
- Legal Requirements – Some areas may require licensed professionals to handle certain wasp species or nests, ensuring compliance with local regulations.
While DIY removal may be suitable for small, accessible nests, it’s crucial to evaluate the size, location, and potential risks associated with the nest before deciding. When in doubt or when safety is a concern, it’s wise to enlist the services of a professional exterminator who can safely and effectively handle the task.
Tools and Equipment for Safe Removal
To safely and effectively remove a wasp nest, you’ll need a set of essential tools and equipment. Here’s what you’ll require:
Wasp Spray
Opt for a high-quality wasp spray like “Raid Wasp & Hornet Killer” or “Spectracide Wasp and Hornet Killer.” These products come with a long-range nozzle for added safety and reach. They typically cost around $5 to $10 per can.
Nest Removal Tool
A long extension pole with a scraper attachment or a specialized wasp nest removal tool like the “Bonide Wasp & Hornet Killer Foam Jet” helps you dislodge the nest. Prices for such tools range from $20 to $40.
Flashlight
A sturdy flashlight helps you see into dark areas where nests might be located, especially for indoor nests. Choose a reliable brand like “Maglite” for around $20 to $40.
Trash Bags
Heavy-duty trash bags are useful for collecting nest debris and ensuring proper disposal. These can cost anywhere from $10 to $20 for a pack.
Sealing Materials
If the nest is located indoors or in a wall void, you’ll need materials like foam sealant or caulk to seal up the entry point after removal. A can of foam sealant typically costs $5 to $10.
Protective Clothing and Gear
Safety gear is non-negotiable when dealing with wasp nests. Proper attire includes:
- Beekeeping Suit – A full beekeeping suit provides head-to-toe protection and typically costs between $50 and $100. Brands like “Humble Bee” and “Mann Lake” are well-regarded.
- Gloves – Choose thick, puncture-resistant gloves like “Vgo Nitrile Coating Work Gloves.” These gloves cost around $10 to $15 per pair.
- Face Shield or Veil – An attachable face shield for your beekeeping suit or a separate beekeeper’s veil ensures protection for your face and neck. These can range from $15 to $30.
- Safety Goggles – Get durable safety goggles from reputable brands like “3M” or “Uvex,” priced between $10 and $20.
Choosing the Right Insecticides or Deterrents
Selecting the appropriate insecticide or deterrent is crucial for successful nest removal. Consider these options:
- Wasp and Hornet Spray – As mentioned earlier, products like “Raid Wasp & Hornet Killer” and “Spectracide Wasp and Hornet Killer” are effective. Expect to pay around $5 to $10 per can.
- Dust Insecticides – For nests in wall voids or underground, dust insecticides like “Delta Dust” or “Drione” are effective. These products cost approximately $10 to $20 per container.
- Deterrent Sprays – Some sprays are designed to deter wasps from rebuilding nests in the same location. “Hot Shot Wasp & Hornet Killer” and “Harris Wasp & Hornet Killer” are popular options, priced at around $5 to $10 per can.
Remember that the choice of insecticide or deterrent may vary based on the type of wasp species and nest location. Always read and follow the product instructions carefully to ensure safe and effective application.
Step-by-Step Wasp Nest Removal Process
Preparation and Planning
- Assess the Nest – Begin by confirming the nest’s location and identifying the wasp species inhabiting it. This information will guide your removal approach.
- Gather Safety Gear – Ensure you have all the necessary safety gear, including a beekeeping suit, gloves, face shield or veil, and safety goggles.
- Assemble Tools – Collect the essential tools, such as wasp spray, a nest removal tool or extension pole, a flashlight, trash bags, and sealing materials.
- Inform Others – Let household members or neighbors know about your nest removal plan, especially if it’s near common areas. Advise them to stay indoors during the process.
Approaching the Nest
- Choose the Right Time – Opt for early morning or late evening when wasps are less active and inside the nest.
- Position Yourself Carefully – Stand at a safe distance from the nest, ensuring you have a clear view and access.
- Apply Insecticide – Use a wasp spray with a long-range nozzle to saturate the nest thoroughly. Apply the spray in the evening when most wasps are inside. Retreat to a safe distance immediately after spraying.
Removing the Nest Safely
- Wait for Activity to Cease – After spraying, wait for at least 24 hours to ensure wasp activity has ceased.
- Use a Removal Tool – If the nest is still attached, use an extension pole or nest removal tool to dislodge it gently. Be cautious not to damage the nest during removal.
- Collect Nest Debris – Place the removed nest and any fallen debris into a heavy-duty trash bag for disposal. Seal the bag tightly to prevent any wasps from escaping.
Dealing with Residual Wasps
- Monitor for Stragglers – After nest removal, some wasps may still be active. Keep an eye on the area for a few days and be prepared to use additional insecticide if necessary.
- Seal Entry Points – If the nest was located indoors or in a wall void, use foam sealant or caulk to seal the entry point to prevent wasps from returning.
- Dispose of Materials – Safely dispose of all used safety gear, empty insecticide cans, and trash bags with nest debris. Follow local disposal guidelines.
Confirming a Successful Removal
- Observation – Observe the area for a few days to ensure there is no wasp activity or signs of nest rebuilding.
- Preventive Measures – Implement preventive measures to discourage future nest-building, such as sealing potential nesting sites, using wasp deterrent sprays, and maintaining a clean outdoor environment.
- Professional Inspection – If you’re uncertain about the success of the removal or notice any resurgence of wasp activity, consider contacting a professional exterminator for an inspection and further treatment.
Remember that wasp nest removal can be dangerous, and safety should always be your top priority. If you’re uncomfortable with any part of the process or unsure about the type of wasps you’re dealing with, it’s advisable to seek professional assistance.
Alternative Methods for Nest Removal
Natural and Non-Chemical Approaches
Sometimes, you may prefer or need to avoid using chemical insecticides. Here are natural and non-chemical approaches for wasp nest removal:
- Soap and Water – Create a mixture of liquid dish soap and water in a spray bottle. Wait until evening when the wasps are inside the nest, then thoroughly saturate the nest. Soap disrupts their respiratory system, causing suffocation. This method may take a few days to fully eliminate the nest.
- Smoke – Use a smoker or a smoke source like a smoldering pile of leaves to produce smoke near the nest entrance during the evening. Smoke disorients and drives away the wasps. Repeat as needed until they abandon the nest.
- Bagging – For nests in trees or shrubs, you can enclose the nest in a large, sturdy plastic bag during the night when wasps are less active. Seal the bag and carefully remove the nest the next day.
Relocation Options for Ethical Removal
If you’d like to relocate wasp colonies rather than exterminate them, consider these ethical removal options. Purchase or create a live trap specifically designed for wasps. These traps allow you to capture the wasps without harming them. Once captured, you can release them in a suitable location away from your property.
Contact a local beekeeper or pest control service that specializes in humane nest relocation. These experts have the knowledge and equipment to safely remove and relocate the entire nest, including the queen and workers, to a new habitat.
If you’re experienced and confident, you can attempt DIY relocation by carefully removing the entire nest and transferring it to a prepared container. Relocate the nest to a remote area far from human activity. To deter wasps from building nests in undesirable locations, provide alternative nesting sites away from your home. Hang up decoy nests or use commercial wasp deterrent products to make your property less attractive to them.
When considering alternative removal methods, always prioritize the safety and ethical treatment of the wasps. If you’re unsure about any of these approaches or the proper handling of wasps, it’s advisable to consult with a professional pest control expert who specializes in ethical removal and relocation methods.
Dealing with Indoor Wasp Nests
Special Considerations for Indoor Nests
Indoor wasp nests require extra caution and care due to the confined space and potential risks. Here are special considerations for handling indoor wasp nests:
- Safety First – Ensure that you and any occupants of the building are safe and away from the area where the nest is located. Keep pets and children well away from the vicinity.
- Identify Entry Points – Determine how wasps are entering the indoor space. Check for cracks, holes, or gaps in walls, ceilings, or windows that may serve as entry points. Seal these openings temporarily to prevent further entry.
- Ventilation – Ensure proper ventilation in the area to disperse any fumes or chemicals you may use. Open windows and doors if possible to allow fresh air in and assist in wasp removal.
- Isolate the Area – If feasible, isolate the room or area with the nest by closing doors and sealing gaps around them. This prevents wasps from spreading to other parts of the building during removal.
- Lights Off – Keep the lights off in the room with the nest. Wasps are less active in the dark, which can make removal safer.
Professional Assistance for Indoor Nests
Indoor wasp nests can be particularly hazardous due to the confined space and the potential for wasps to enter living areas. If the indoor nest is large or has been present for an extended period, it’s best to enlist the help of a professional exterminator. Large nests can house a significant number of wasps, making removal more complex.
If you’re unsure of the exact location of the nest or how to access it safely, professionals can use specialized equipment like fiber optic scopes to locate and remove the nest without causing damage. If anyone in the household is allergic to wasp stings, professional assistance is crucial to minimize the risk of stings during removal.
Indoor nests, particularly those within walls or ceilings, can pose structural risks. Professionals can assess the situation and minimize potential damage during removal. If indoor nests are becoming a recurring issue, professionals can identify and address the root causes, such as entry points or attractants, to prevent future infestations.
When dealing with indoor wasp nests, your safety and the safety of others should be the top priority. If in doubt or if the situation seems challenging, it’s best to contact a licensed pest control professional who can safely and effectively handle the nest’s removal while minimizing risks to occupants and property.
Preventing Nest Rebuilding
Strategies to Prevent Future Nests
Preventing future wasp nest infestations requires a proactive approach. Here are strategies to deter wasps from rebuilding nests on your property:
- Seal Entry Points – Regularly inspect your home and property for openings, gaps, and cracks that may serve as potential nesting sites. Seal these entry points using caulk, mesh, or other suitable materials to block wasp access.
- Remove Attractants – Ensure outdoor garbage cans have tightly sealed lids, as wasps are attracted to food scraps. Rinse food containers before disposing of them to eliminate odors that can attract wasps.
- Trim Vegetation – Keep trees, shrubs, and bushes near your home well-trimmed. Overhanging branches and dense vegetation can provide ideal locations for nest-building.
- Decoy Nests – Install fake wasp nests or decoys in vulnerable areas. Wasps are territorial and may avoid building nests near existing ones. Commercially available decoy nests are designed for this purpose.
- Maintain Cleanliness – Regularly clean outdoor dining areas, grills, and picnic areas to remove food residue that can attract wasps.
- Cover Food and Drinks – When eating or drinking outdoors, use lids or covers for food and beverages to prevent wasps from being attracted to them.
Regular Property Inspections
To stay ahead of potential wasp nest issues, conduct regular property inspections:
- Scheduled Inspections – Establish a schedule for inspecting your property, especially in the spring and summer when wasp activity is high.
- Survey Problem Areas – Focus on areas that have been prone to wasp nests in the past or areas where you’ve noticed wasp activity.
- Check Eaves and Overhangs – Inspect the eaves, roof overhangs, and wall voids for signs of nest-building or wasp activity.
- Inspect Potential Nests – If you’ve removed a nest previously, revisit the site to ensure wasps haven’t returned.
- Seek Professional Assistance – If you’re unsure about your ability to inspect safely or suspect a nest but can’t locate it, consider hiring a pest control professional for a thorough inspection.
By implementing these prevention strategies and conducting regular property inspections, you can significantly reduce the likelihood of wasp nests on your property. Early detection and proactive measures are key to a wasp-free environment and a safer outdoor experience.
Disposal of Removed Nests
Properly disposing of removed wasp nests is essential to prevent potential risks and ensure environmental responsibility:
- Wear Safety Gear – Even after removal, wear your protective gear (beekeeping suit, gloves, etc.) while handling the nest to minimize the risk of stings.
- Double-Bagging – Place the removed nest, along with any debris, inside a heavy-duty trash bag. Double-bagging adds an extra layer of protection.
- Secure Closure – Seal the bags tightly to prevent any remaining wasps from escaping. Use strong, thick trash bags that won’t tear easily.
- Label Bags – Clearly label the bags as “wasp nest” or “dangerous insect nest” to alert waste collectors and others to the contents.
- Avoid Crushing – Handle the bags with care to avoid crushing the nest. Crushing may release any remaining wasps, which can be dangerous.
- Dispose at a Designated Facility – Contact your local waste management or recycling center to inquire about their guidelines for disposing of hazardous materials like wasp nests. Follow their instructions for proper disposal.
- Don’t Burn Nests – Never attempt to burn wasp nests, as this can release toxic fumes and cause fires. It’s both dangerous and environmentally harmful.
Environmental Considerations
Consider the environmental impact when disposing of wasp nests:
- Avoid Harmful Chemicals – If you used chemical insecticides for removal, be cautious about their environmental impact. Follow the instructions on the product label regarding disposal.
- Prevent Nest Reuse – To prevent other wasps from reusing the nest materials, soak the nest in a bucket of soapy water for several hours before disposal. This will render the materials unusable.
- Natural Decomposition – In some cases, nests made of natural materials like paper may naturally decompose over time. If appropriate, you can place the sealed bags in a dry, outdoor area to allow decomposition.
- Consult Local Regulations – Check with your local environmental agency or waste management authority for any specific guidelines or regulations regarding the disposal of wasp nests.
- Recycling – Some areas may allow the recycling of paper wasp nests as long as they are thoroughly soaked and cleaned. Check with your local recycling facility for guidance.
By following safe disposal practices and considering environmental factors, you can ensure that your wasp nest removal efforts are not only effective but also environmentally responsible. Proper disposal protects both you and the ecosystem around you.
Conclusion
Safe wasp nest removal is not only about protecting your property but also safeguarding your health and the environment. Mishandling nests can lead to painful stings, allergic reactions, and structural damage. Safe removal practices also respect the ecological role of wasps as pollinators. By following the guidelines in this guide, you can address wasp nest issues while minimizing risks. Making informed decisions when dealing with wasp nests is paramount. Whether you choose to handle it yourself or hire a professional, safety and proper techniques should always be priorities. By understanding the risks, following recommended practices, and seeking professional help when necessary, you can ensure a safer and more successful wasp nest removal experience.